
Systems
Wall & Floor systems
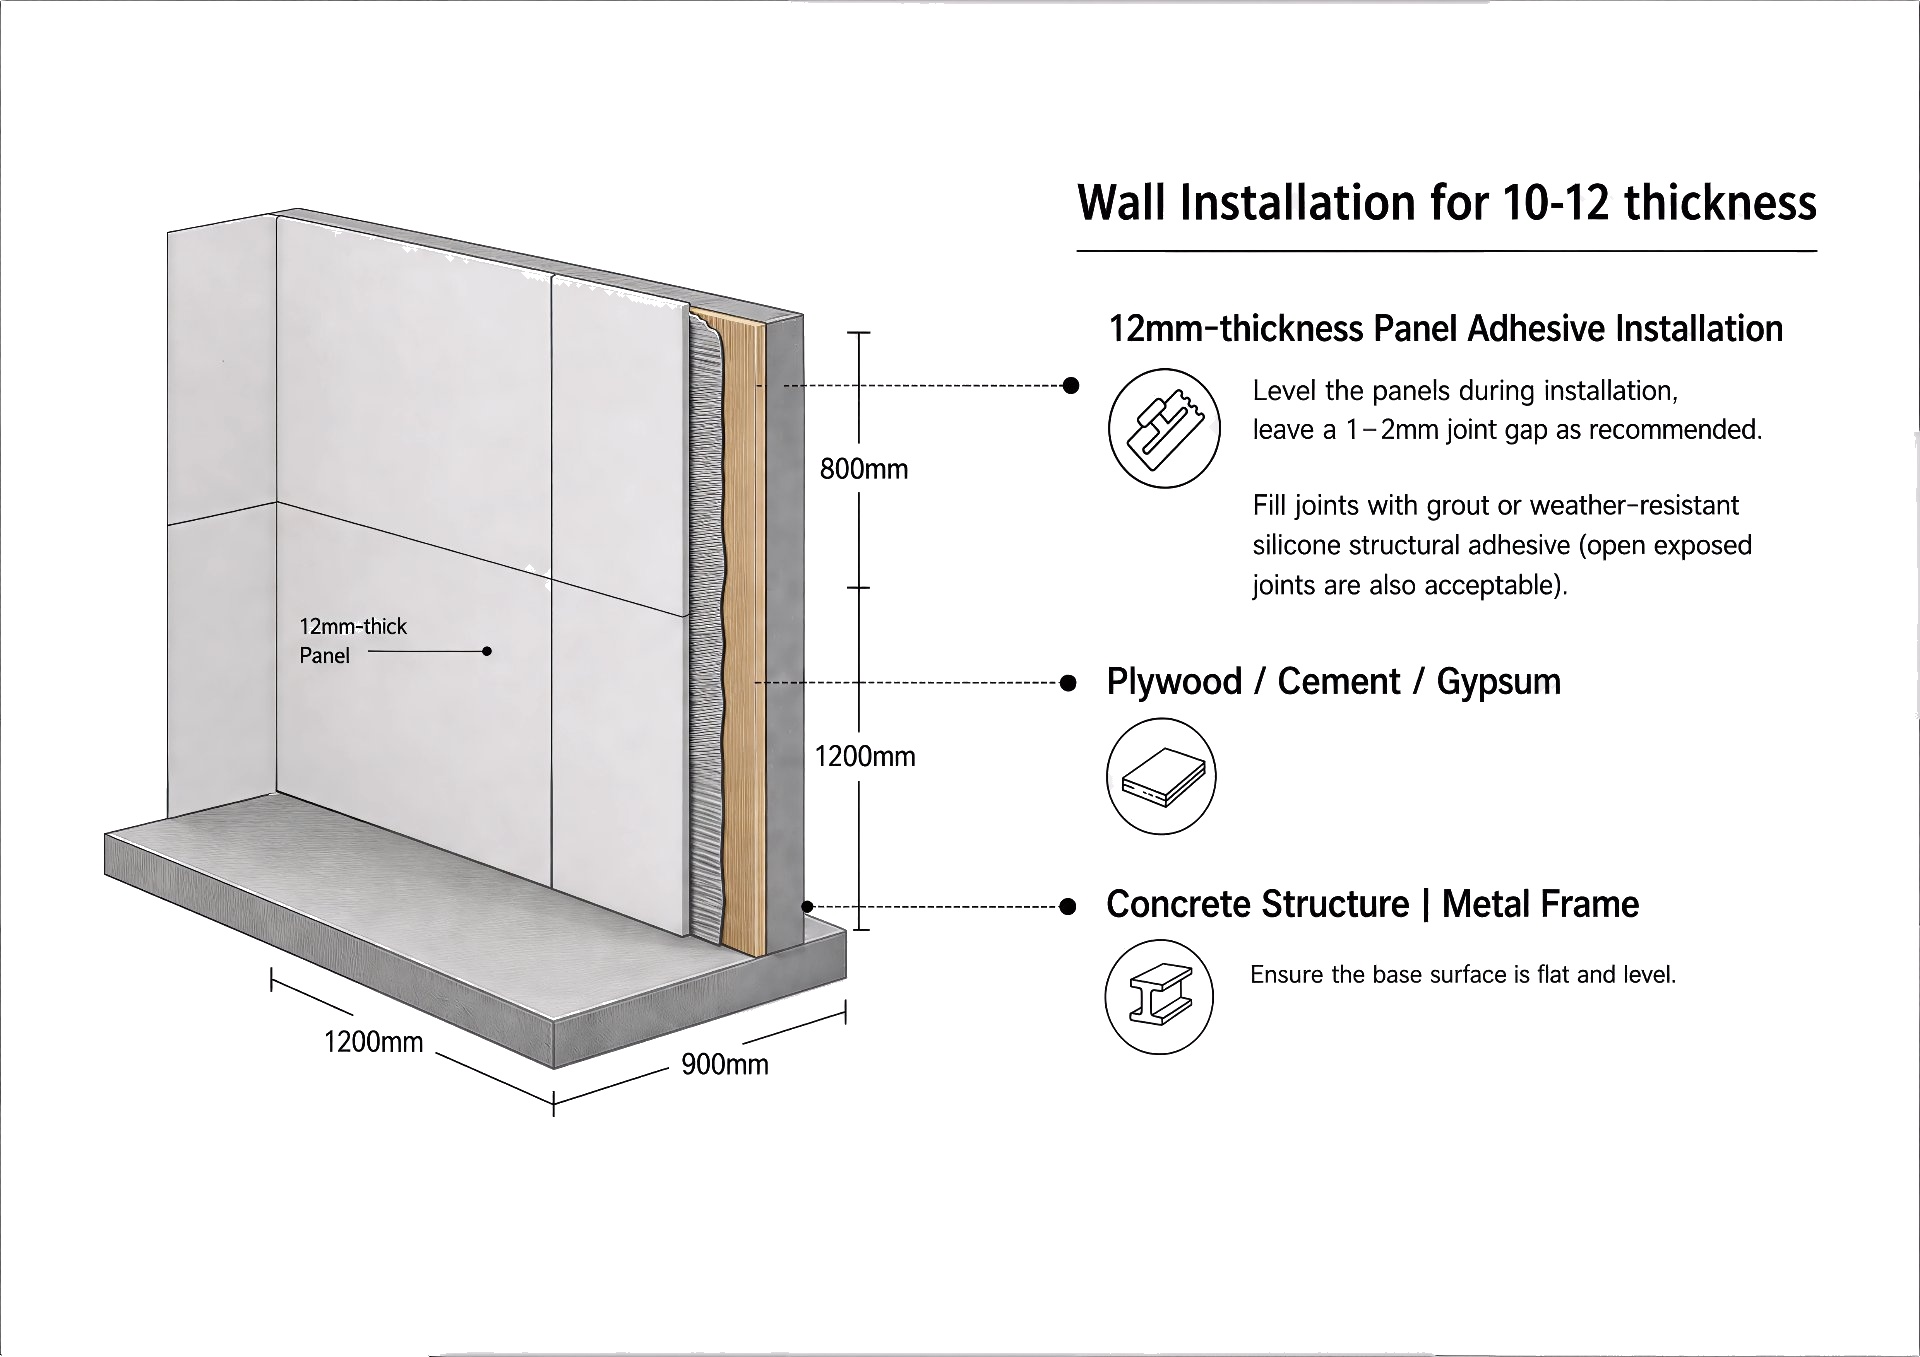
Wall Installation for 10–12 mm thickness
12 mm-thick Panel Adhesive Installation
Level the panels during installation, leave a 1–2 mm joint gap as recommended.
Fill joints with grout or weather-resistant silicone structural adhesive (open exposed joints are also acceptable).
Ensure the base surface is flat and level.
Elements
Dimensions: 1200 mm panel · substrate 800 mm / 900 mm
Indoor wall installation for 10–12 mm panels: adhesive bonding over plywood / cement / gypsum substrate, with 1–2 mm joint gaps.
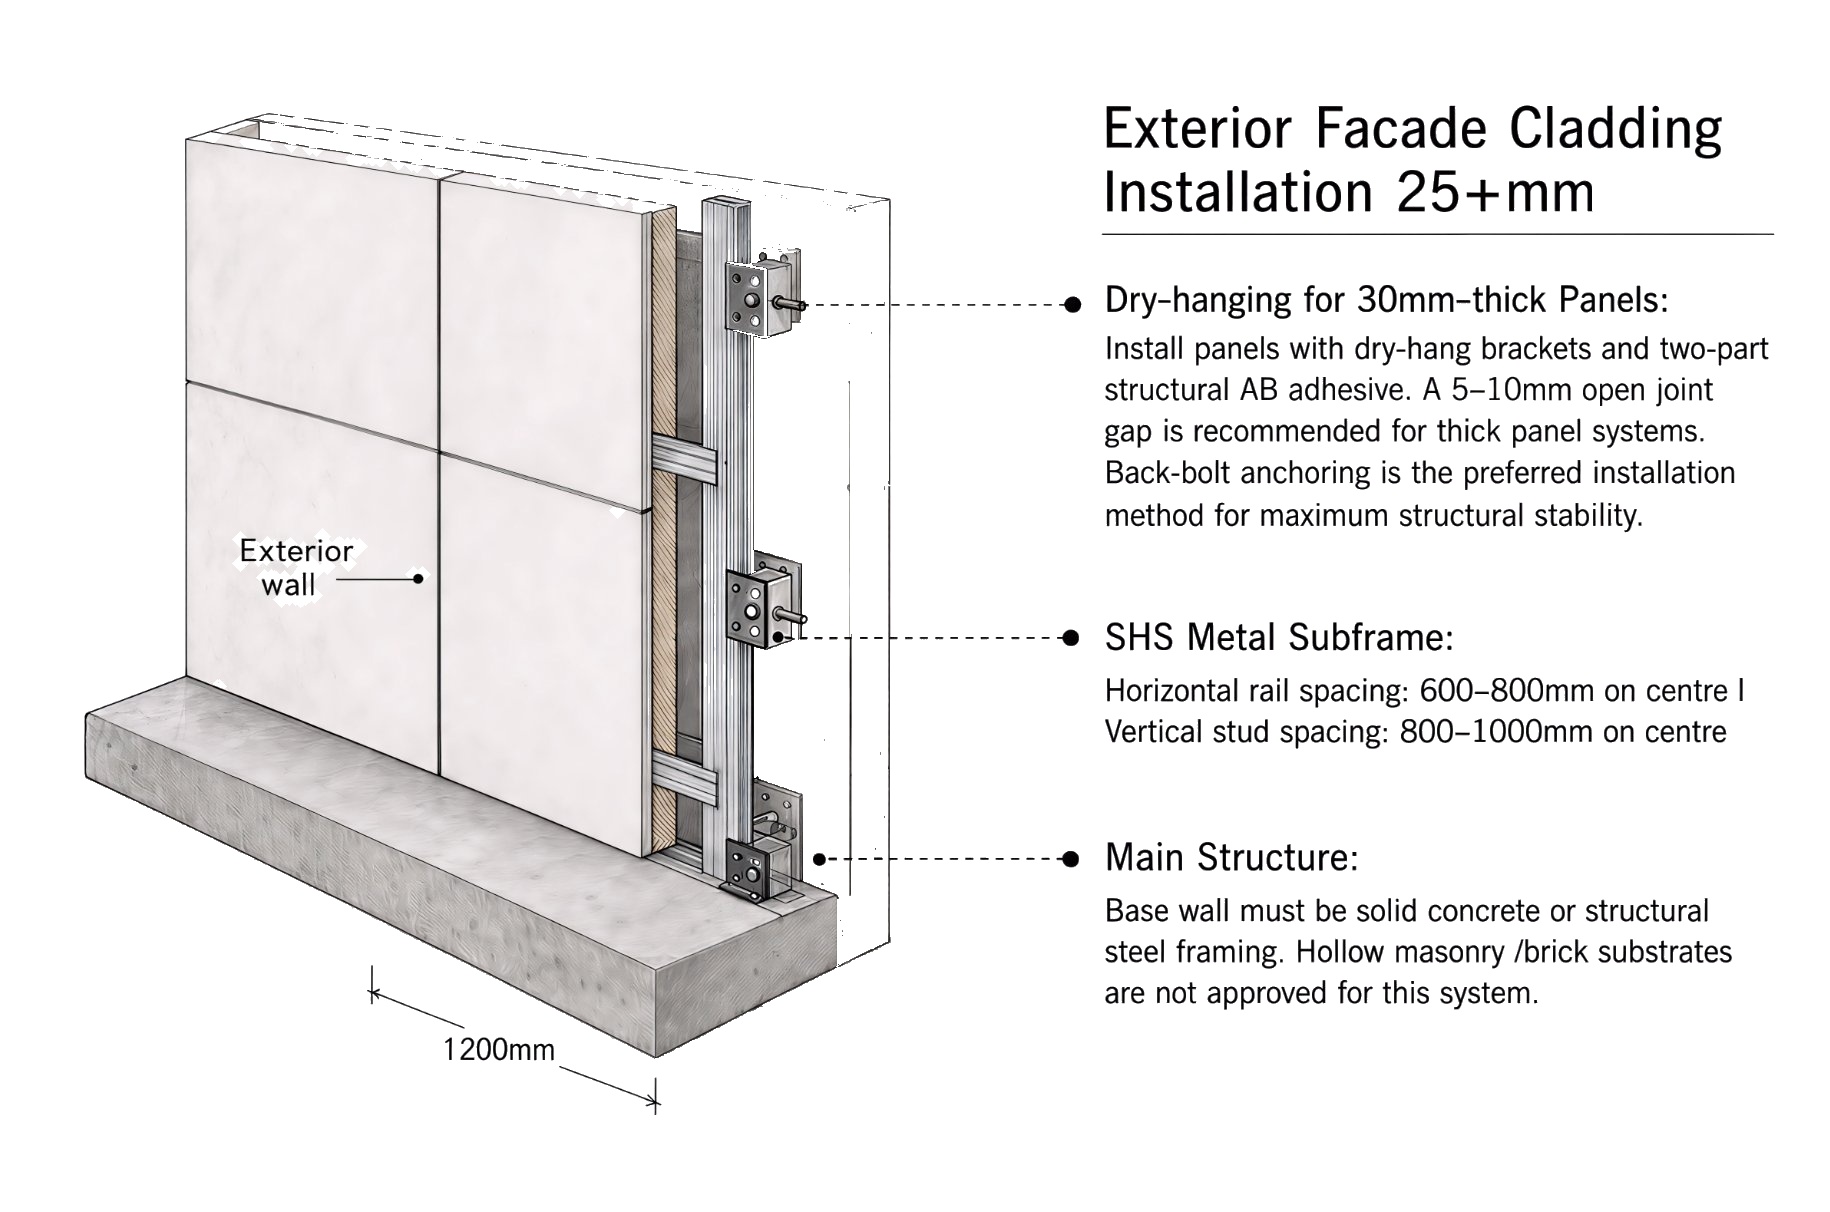
Exterior Facade Cladding Installation (25 mm)
Dry-hanging for 30 mm-thick Panels:
Install panels with dry-hang brackets and two-part structural AB adhesive.
A 5–10 mm open joint gap is recommended for thick panel systems.
Back-bolt anchoring is the preferred installation method for maximum structural stability.
Elements
Panel width: 1200 mm
Outdoor facade cladding installation for 25+ mm panels: dry-hanging with metal subframe and back-bolt anchoring, 5–10 mm open joints.
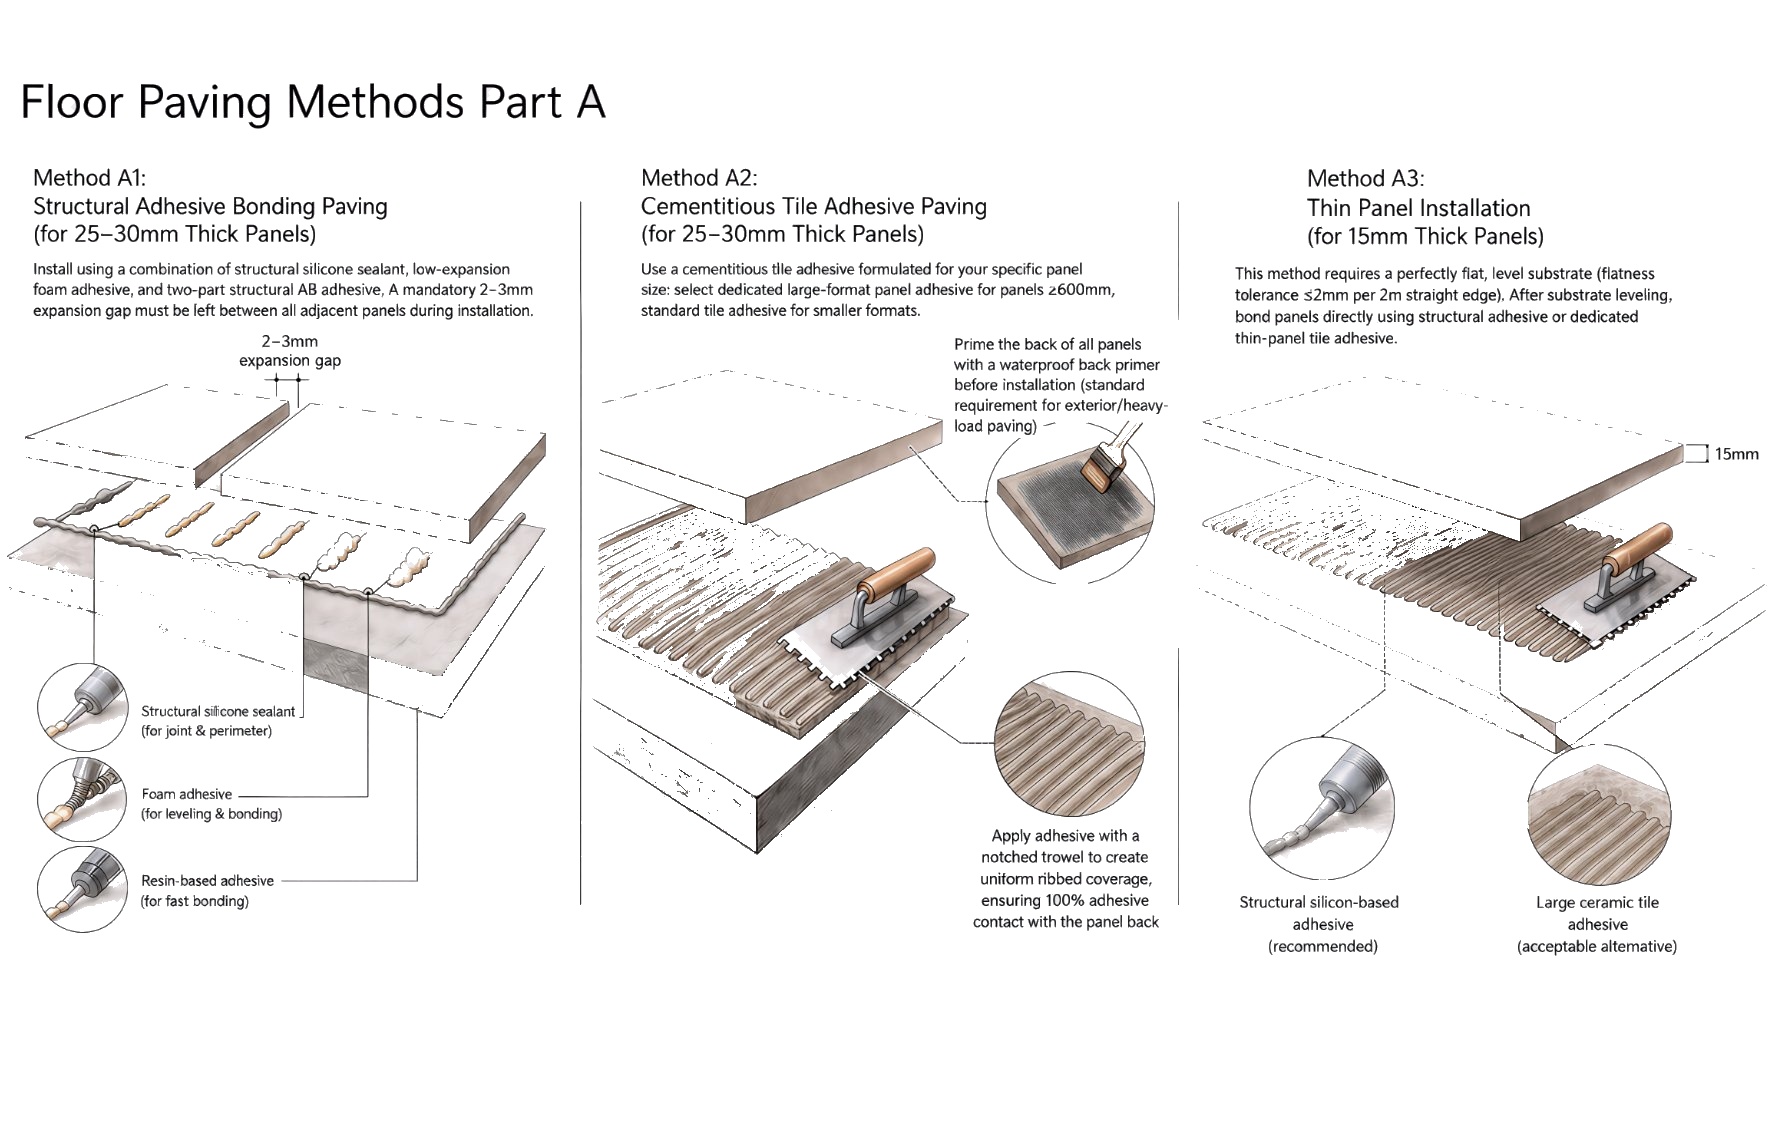
Floor Paving Methods — Part A
Method A1: Structural Adhesive Bonding Paving (for 25–30 mm Thick Panels)
Install using combination of structural silicone sealant, low-expansion foam adhesive, and two-part structural AB adhesive.
A 2–3 mm expansion gap must be left between all adjacent panels.
Method A2: Cementitious Tile Adhesive (for 25–30 mm Thick Panels)
Use cementitious tile adhesive formulated for your specific panel size: select dedicated large-format panel adhesive for panels 2600 mm.
Flatness tolerance 5 mm per 2 m straight edge, after substrate installation. Standard tile adhesive for smaller formats.
Method A3: Thin Panel Installation (for 15 mm Thick Panels)
This method requires a perfectly flat, level substrate (flatness tolerance 5 mm per 2 m straight edge), after substrate installation.
Bond panels directly using structural adhesive or dedicated thin-panel tile adhesive.
Prime the back of all panels with waterproof back primer before installation (standard requirement for exterior / heavy-load paving).
Materials
Floor paving methods for 15–30 mm panels: structural adhesive bonding, cementitious tile adhesive, or thin-panel installation.
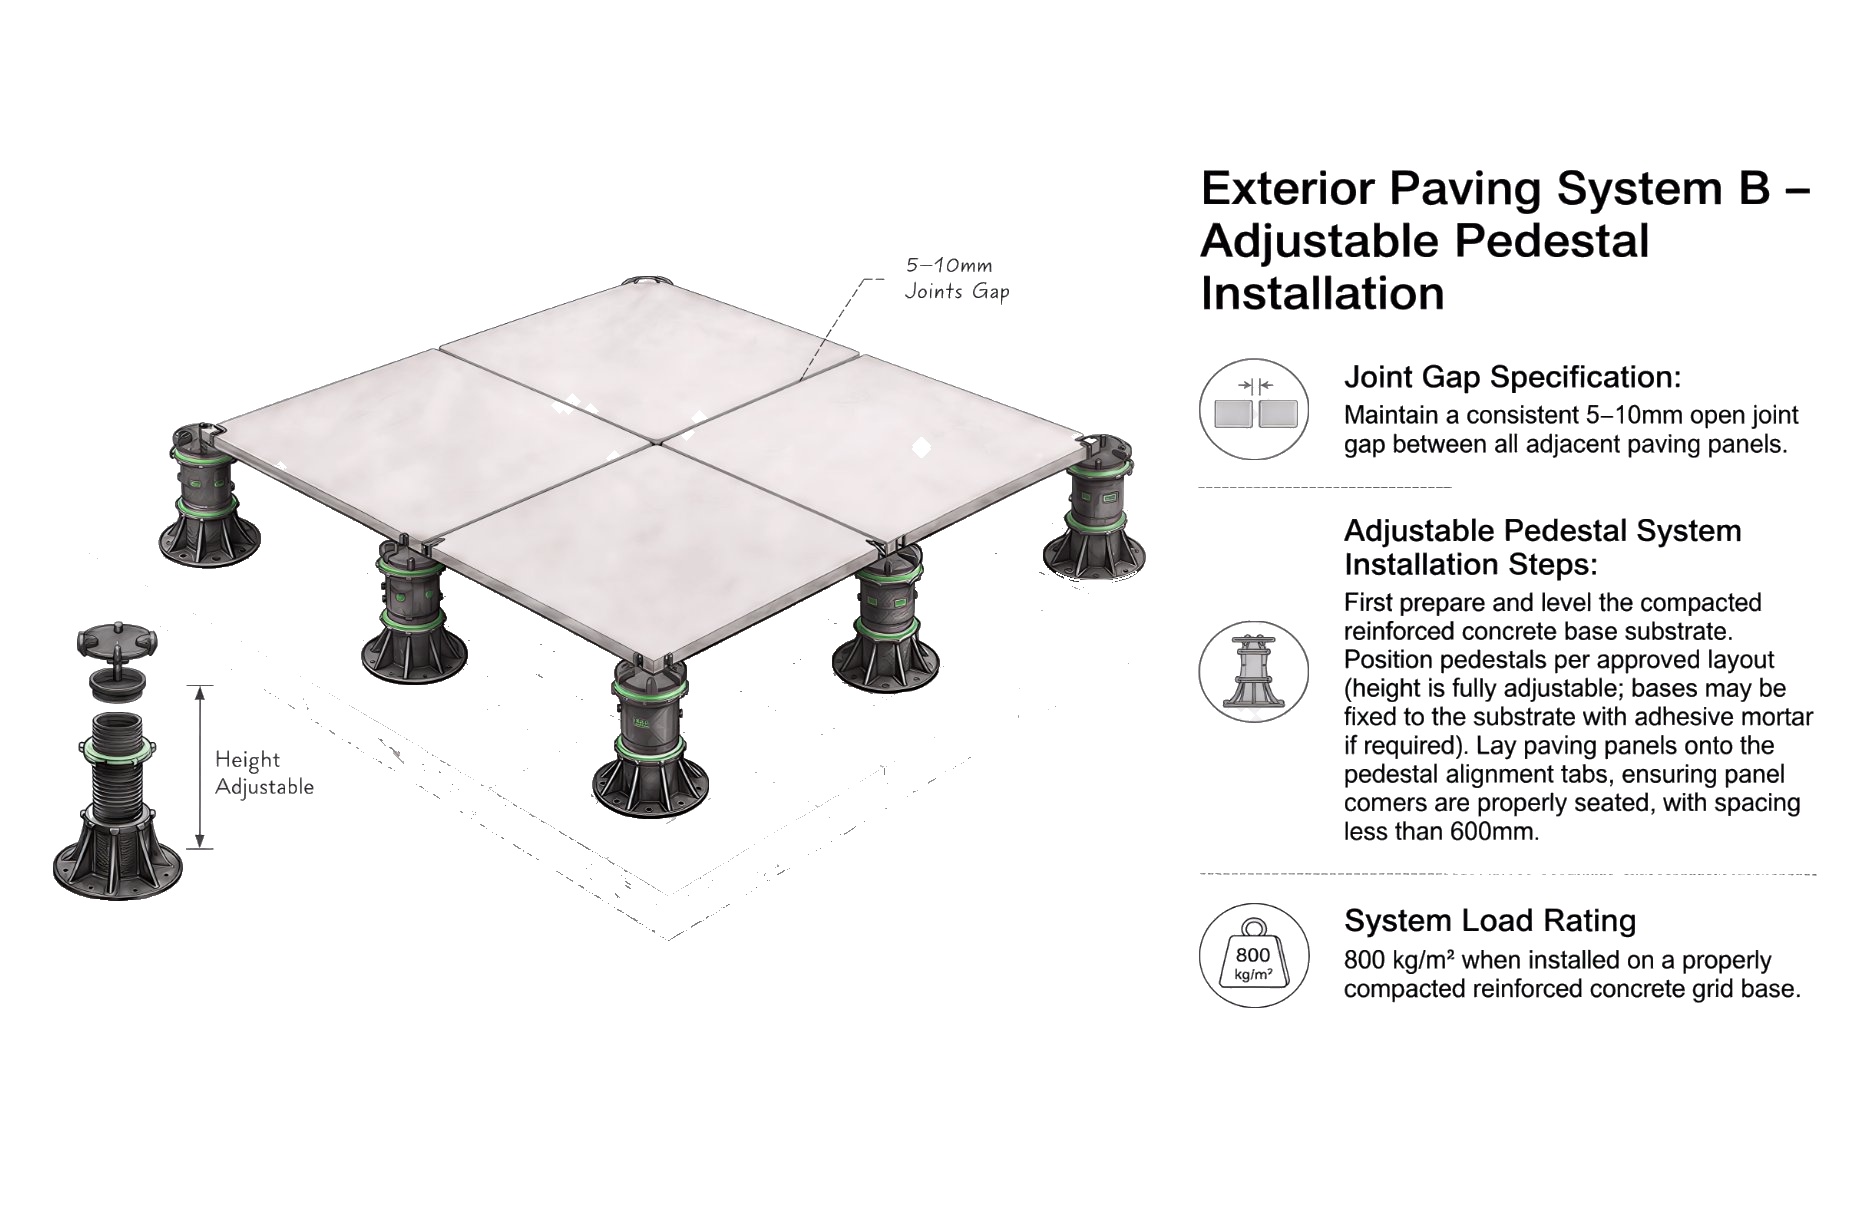
Exterior Paving System B — Adjustable Pedestal
Joint Gap Specification:
Maintain a consistent 5–10 mm open joint gap between all adjacent paving panels.
Adjustable Pedestal System Installation:
First prepare and level the compacted reinforced concrete base substrate.
Position pedestals per approved layout (height is fully adjustable; bases may be fixed to the substrate with adhesive mortar if required).
Lay paving panels onto the pedestal alignment, ensuring panel corners are properly seated, with spacing less than 600 mm.
System Load Rating:
800 kg/m² when installed on a properly compacted reinforced concrete base.
Exterior raised paving: adjustable pedestal system with 5–10 mm joint gaps, load rating up to 800 kg/m².